Monday, March 28, 2016

AN AMERICANA QUILT PATTERN......

by COUNTRY THREADS.
Since I sell patterns in my shop I like to have finished models made.
The patterns sell faster that way.

 I went thru my homespuns and flannels and put a pile on the cutting table and was able
to pick and choose to make the different units.

Don't worry.... the letters do spell something!


Americana flower blooms.

The background is pieced and I had to add the borders as I went because some of
the units get stitched on the borders.

Here is the finished top loaded on the longarm system.
Liberty Basket.......by Country Threads.
They've gone out of business but I still have some patterns available.

Because there are so many different areas separated by applique,
I decided to quilt randomly and with abandon.
No rhyme or reason...just lines here and there...circles wherever.
Circles around circles.

Some of the border is done with piano key and another section with a
type of checkerboard and clam shells on a third border.
I opted to do the borders in three different red fabrics and then thought each
color should be a different quilt style.

Don't know why the picture got turned but can't figure out how to upright it.

The backing fabric is a cute Americana print.
I'm thinking it is
 a Debbie Mumm from quite a few years ago.

And then a sneak peak at the next project in the works.

Happy Stitching Quilty Friends.....


Monday, March 7, 2016

ORIGINALSCRAPPY FEEDSACK QUILT..........

 FINISHED.
The front of the quilt is very busy so the pattern does show very well.
The back shows the quilting pattern better.
How about that zig zag border?
The top and bottom borders were straight.
It was not fun to bind the zig zags.
I had never done it before so I found a webpage that went into detail about the process.
Not as hard as it looks, it did take a good 2 hours though.
                        I outlined each offset block and then did swirl in each "arm" of the block.
I found a reproduction fabric in the color that the client requested.
A lot of the fabrics were too cutesy with ducks and bunnies but didn't fit with the overall look of the quilt. This fabric was perfect.
I like to document the journey of a quilt if I have information about it.
My client had the information I needed so I did this awesome label on the computer.
It documents the recipients through the years and in small print
I put  my information on the bottom because, of course, they didn't do longarm quilting that long ago.


And onto my next client quilt. A very simple rail fence.
the piecing on this is perfect and each "rail" is exactly the same size.
If you've ever done a quilt where the blocks vary by 1/2 to 1".....
NOT FUN!!!!
Throws off the ruler work math terribly.......

Happy Quiltmaking everyone!

Tuesday, February 23, 2016

IN THE PROCESS...........


..................of the big rearrangement I found this cute bunny fabric.
Actually, I found a lot of piles of projects that I meant to do and then didn't for one reason or another.
The center of this tablerunner is a solid strip 11x42" of the cute bunny fabric.
I added a 1" light border and then a 4" matching dark outer border.
Because there is no piecing of blocks it went together fairly quickly.
I immediately put it on the longarm system. The border is simple arches and the center I stitched with diagonal lines 1" apart all the way across.
The back is the same striped fabric as the inner border on the front.
I then binded it in the same green as the wider border.
I almost always bind in a darker color than the last border or the same fabric.
So.................here it is on my table.
I don't do cute and my table is round and small so it doesn't fit.
The size is approximately 19x50".
It will go into the shop in time for the Spring Open House later in April.

Happy Quilting everyone!

Monday, February 22, 2016

ONE DAY LAST WEEK.............

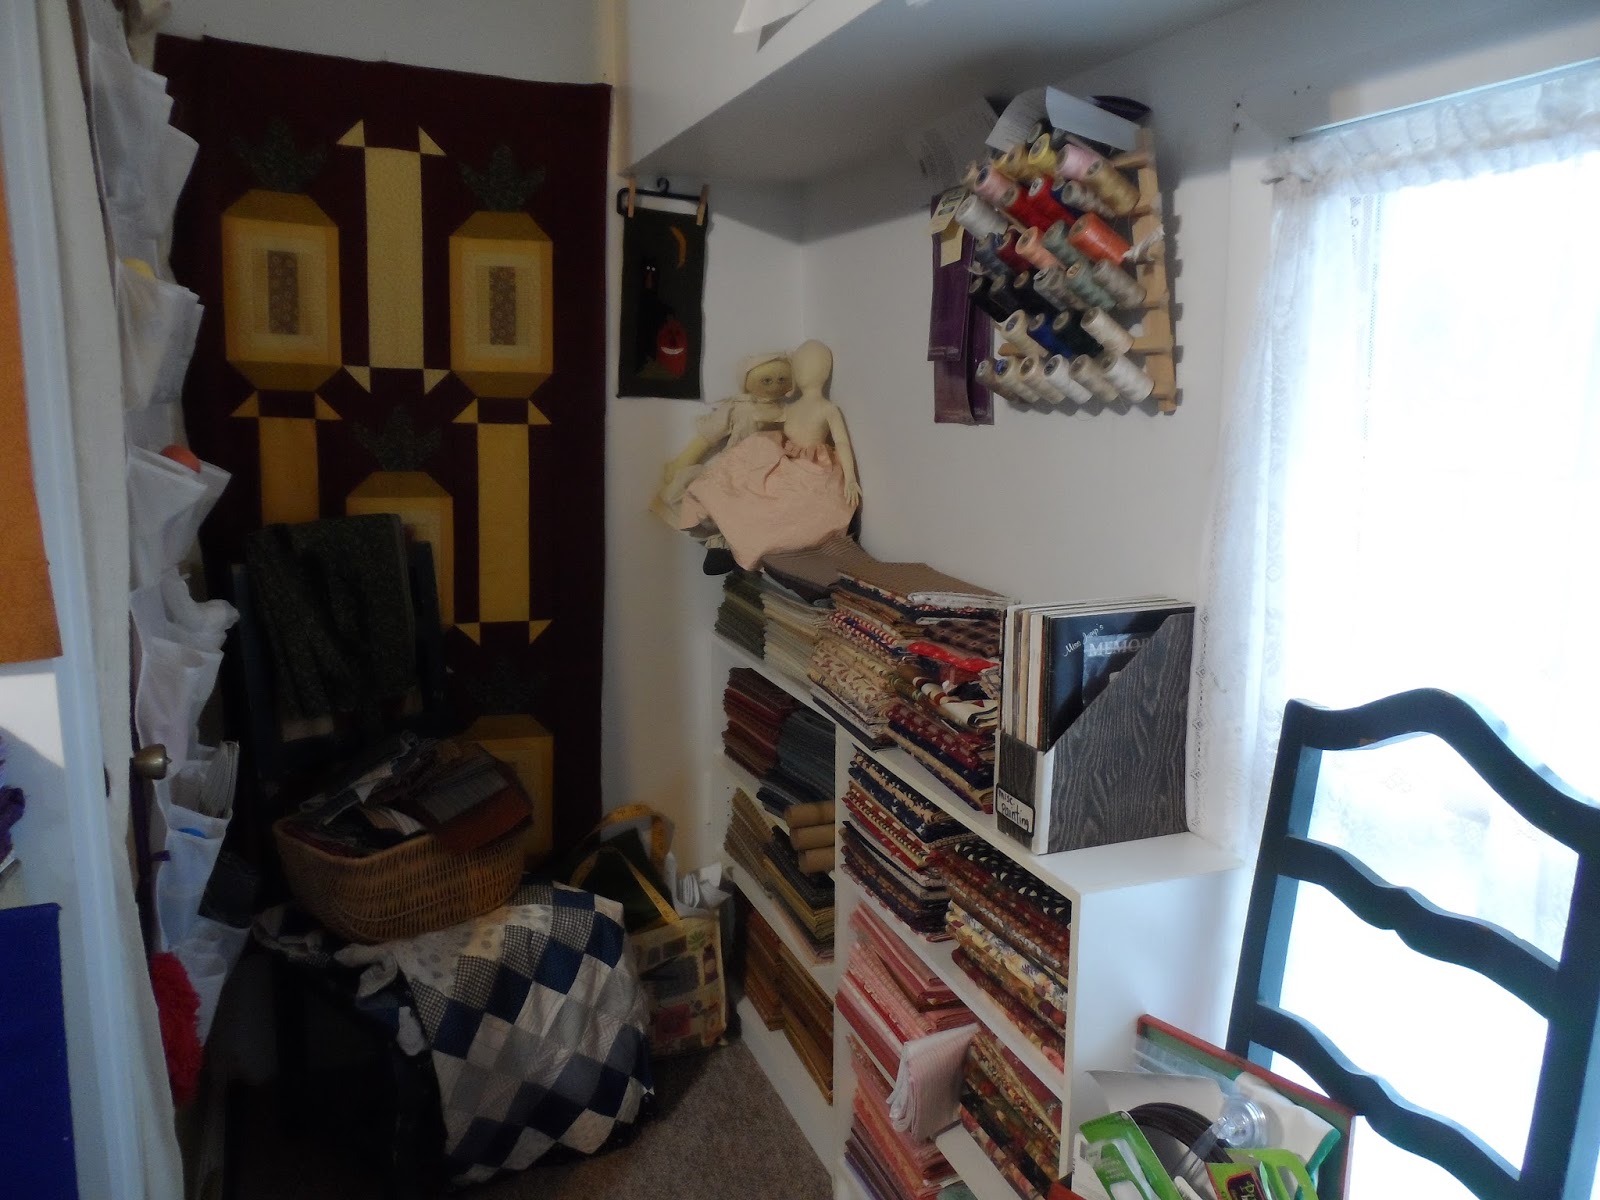
..............was spent tidying up the quilting loft.
All the furniture was lined up in rows and was not efficient.
I had to walk around the sewing table to get to the cutting table and there wasn't
room to walk in the aisles and I had to stand sideways to pick and choose fabrics.
The picture above is the before.
The picture below is the after. I love it!!!
Look at all the space in the center.
This space is about 15x20 feet.
To the left is a 3x5 cutting table which sits on top of counter height shelf units.
These units hold my stash, which is stacked by color.
Straight ahead is my 30" by 8 foot sewing table, lots of room to lay out blocks etc.
right in front of the sewing table is a design wall and there are currently
two applique quilts hanging there waiting for borders.
To the left between the two tables is the ironing board.
Beyond the ironing board is a half wall to the kitchen and right over that half wall is the sink so I can reach over to fill my iron without having to leave the ironing station.
On the right side of the room is my longarm system.
And another design wall beyond the longarm.

Underneath the longarm system are baskets organized by color and they hold scraps.

This is a little cubby space with more shelf unit with more fabric stash.
I have a shoe rack on the back of the door for thread storage.
The door goes down the back stairs into the shop.

Another cubby space on the other side of the stairs and that's where I have batting rolls.

Shelf units under the cutting table holding green, red and blue fabrics.
Well............there you have it.
My happy place.
Since I rearranged I have finished two client quilts......
two tablerunners.........
loaded another client quilt on the longarm system.........
designed the layout for a butterscotch hued queen quilt top........
cut fat quarters for the shop........
and about twelve other things on the to-do list.
Whew..........I'm tired!!!

Happy Quilting everyone!


Monday, February 15, 2016

An ORIGINAL 1920'S QUILT............

........on the longarm system today.


 The blocks are in really bad shape.
I had to go over them and trim off all the torn patches and it was most of some of the blocks.
I had to trim around the hand quilting that was already done.
The quilting is like 5 stitches to an inch.
see picture below too.........


This is the back.
It is pieced with original feedsacks and they are in really good shape.
No tears or worn sections at all.

My client got this quilt from a family member so it has sentimental value to her and she wants to use the quilt for display so my solution was to cover the very worn out front
with backing and use the original back as the front.
Does that make sense?


Since the quilt was already layered and quilted (and heavy) I did not use batting when I added the new backing.
I rolled the new backing on the longarm and put the worn pieced side of the quilt face-down  and proceeded to "quilt" (see above picture).
Every 6" I quilted a little half flower across the width and then rolled down 6"
 and quilted another row.
The original maker used two tablecloths for the batting.
So my quilt sandwich consisted of
new backing
pieced blocks
tablecloth
tablecloth
original feedsack pieced backing
and my machine handled it like the queen that she is!


My next project is also an original early 1900's quilt top from a client
who inherited it from a family member.
This one is just the top so I will be able to have some fun with it.

Until next time...........

HAPPY QUILTING!!!


TABLETOPPER REDONE.............

 .................INTO A WALLHANGING OR COUCH THROW.
First...see the lace around the edge....that had to come off!
There is no batting in the layers but there is a pieced top and a backing.
It was hand quilted with a big stitch just enough to hold the layers together.
A label on the back identified the maker as Peggy F_____.
I don't want to put her full name in case she doesn't want her name on the net.
Also....there are places that are stiff where I believe a spray adhesive was used.
Which led me to think it was never washed.
This is the before.............
 ..................and after the longarm magic.
See how it hangs funny on the left side? Well....when I loaded the quilt on my longarm system, I make sure it is straight across the top.
So I'm going along, happily quilting and rolling, quilting and rolling....
I get to the bottom of the quilt and it is a good two inches or more longer on the left side....WHAT????
Do I leave it or do I trim it?
I decided to leave it.....trimming it would have made the border look awkward...6" on one side and then tapering down to 3" on the other.
I don't know....what would you have done?
 A little detail.
This was hard to quilt because there seemed to be too much fabric.
Maybe that's why the one side was too long.
I had to work in the extra so my plan to do geometric ruler work wouldn't look that good.
 Some more detail.
I used cotton batting and another backing because I wasn't going to spend the time to remove the hand quilting. My longarm handled it beautifully. Even thru the stiff adhesive
And the back...
Love the texture.
I hope my client loves it.
What a difference.

I have already loaded another quilt on the longarm from the same client.
This is one she inherited and its from the early 1900's and it shows.
So until next time...........

HAPPY QUILTMAKING!!!


Wednesday, February 3, 2016

Finally................

................TA-DA!!!!!!!!!!
My 19 year old project...........
I finally
finished the hand applique of the blocks.
If I remember correctly there are 18 sections to this quilt
by Jan Patek and Linda Brannock.
The neatest thing about these BOM patterns is that there is an alternate
project with extra pattern pieces.
I have a couple of these complete sets of patterns for sale in my shop.
I know they are "old" but so perfect for primitive quilting.
I also have an awesome selection of homespun fat quarters.


This is a Lonestar baby girl quilt.
It is a client quilt I just finished and took off the longarm system.
I don't know why, but most of my clients give me their precious quilts and let me choose
quilting designs and thread colors.
That's the hardest part because you don't know what they might like or not like.
What do you possibly say to someone who says they aren't pleased with what you did.
It hasn't happened to me and I hope it never does.....
but....never say never.
I have another one to put on and quilt.
And, again, this client says "you choose. I trust you".
OH DEAR!!!!
Off to my quilting loft..............


Monday, January 18, 2016

I'm on a roll..................

another finish..........YEAH!!
Assorted homespun strips in mostly browns and blues, a little bit of green...........
       ........sewn into a panel. The panel is 15 one inch strips long and 42" wide. I only needed a 7" strip so I will be making the rest of the panel into a table runner. Very country primitive.
And the finished block.......Only one more to go which I will start now because I did all the prep work this afternoon. I like to put on mindless crime shows or movies on TV while I do handwork.
While I was at my cutting table I ripped homespun fabrics into fat quarters.
I bet I have 600 or so pieces of homespun that I've collected over the years. Most are 2-4 yards each.
Putting them in the shop for sale.
Ooops.....Picture is sideways.
I also rip a 2-3"  strip from each one .
I use them to tie onto all my baskets and graters and enamelware buckets and bowls
that I sell in the shop.

Friday, January 15, 2016

More primitive blocks......................


 for the design wall. I finished these four sections and I only have 2 more to go.

 This Patek/Brannock pattern is almost 17 years in the making.
I can't believe I only have two more to go.
I spent the day in my sewing loft and was able to piece two tablerunners and stitched some 2" green and brown strips together. I'm not sure what I will do with the panel yet.
I will open my shop tomorrow and have to work a real job for a few hours tomorrow night so won't get any sewing done.
But............I have off the next two days so they will be spent in the loft.
I hope you have time to do some sewing.
Until next time................

Saturday, December 26, 2015

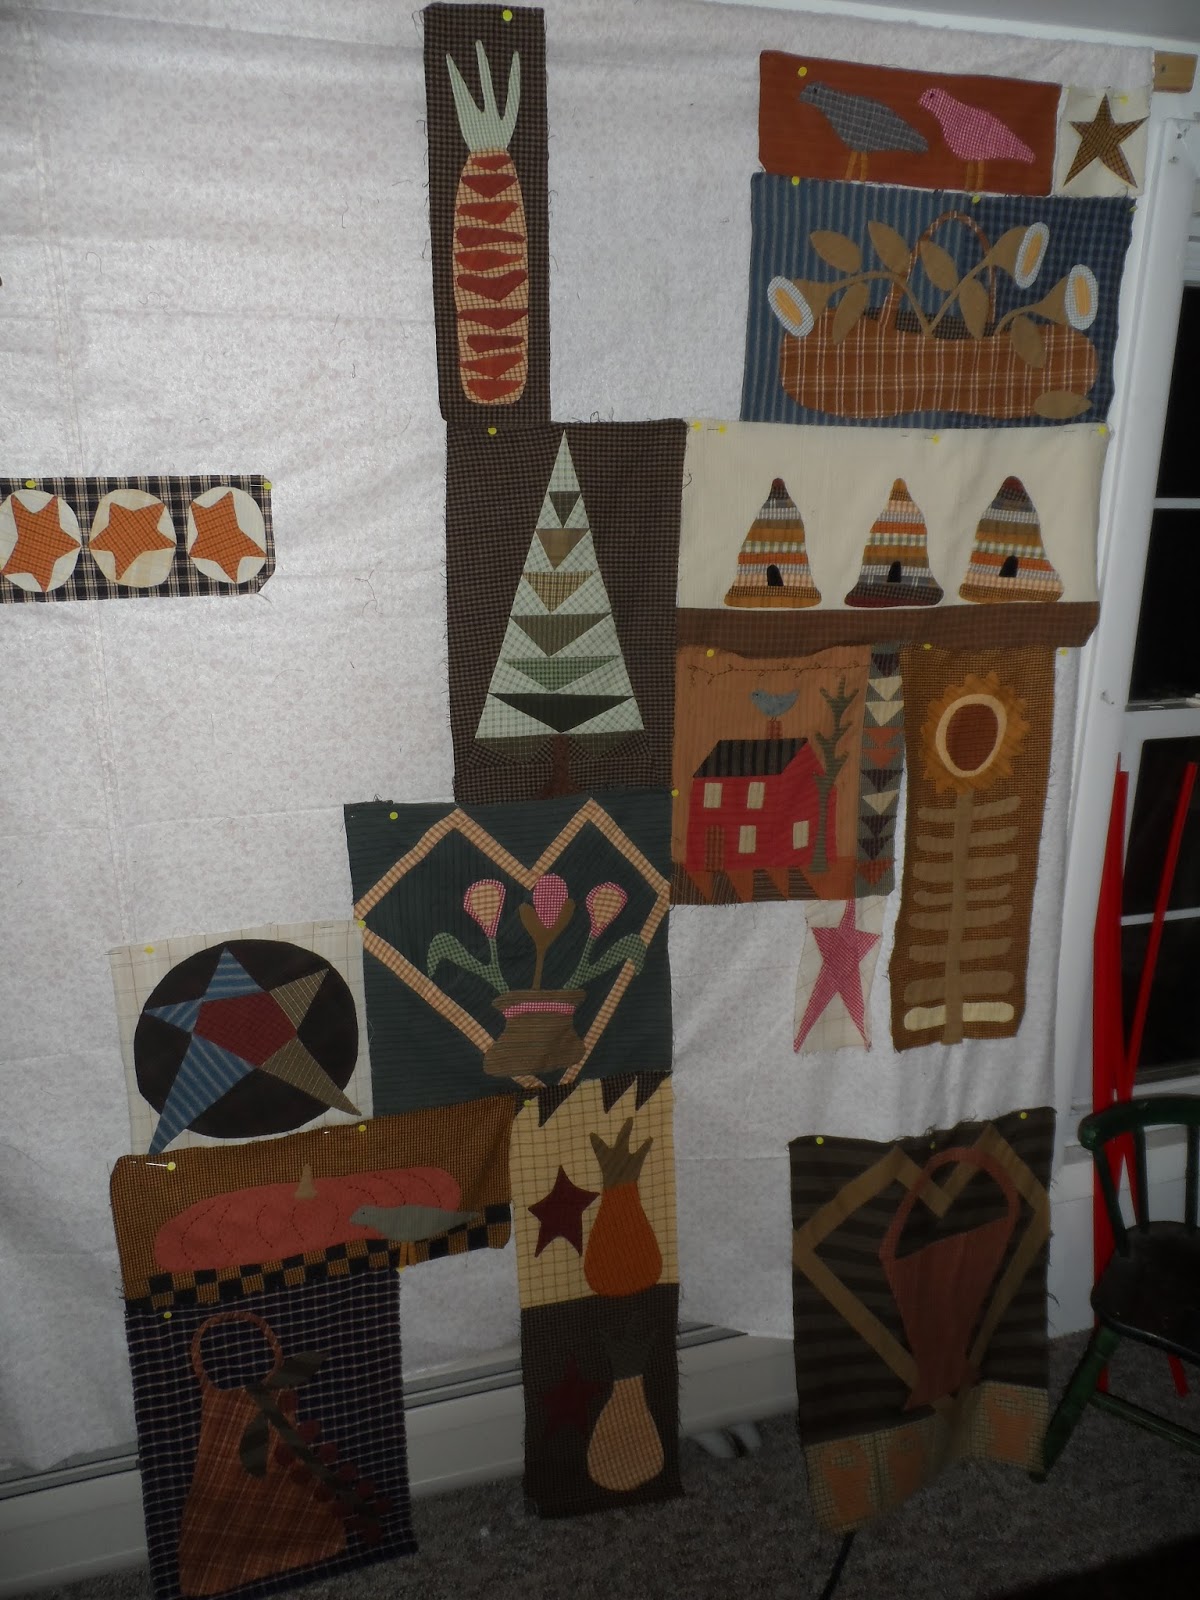
Primitive blocks..........


........on my design wall.
I started these blocks way back in 1997.
If you will....notice the empty spaces. That is where I need to fill in with more blocks
I like to lay out the blocks so I can see the colors, that way I won't duplicate similar colors in adjoining blocks.
This is the latest one I finished yesterday.
I think I only have four more to go but some of them are multiple sections.
I am using almost all homespun plaids and brushed cottons, which I have been collecting for twenty five plus years.
This pattern was a block of the month in 1996 by
Linda Brannock and Jan Patek.
I love their work and collected all their books and patterns.

Whether you do hand work or by machine........
Happy stitching everyone!